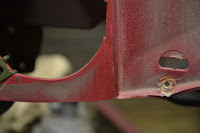
I knew that there was a few places to repair on the dash when I was in the salvage yard. The glove box had it's hinge rusted solid and some one tried forcing it and cracked the middle lower part of dash. The speaker areas on both sides were cracked, so I went to Harbor Freight and bought a plastic welding iron kit. Cost around $17.00 comes with plastic and wire mesh as well.
Inspecting the damage. You will need to remove the metal reinforcements from the dash hull to do the plastic welding reinforcement work.
Anything that is in the way will need to be removed. Notice screws on the side and bottom hold the metal dash reinforcement and car mounting brackets to the dash hull. There were needing to be removed for the glove box area to be repaired.
Ducting needs to be removed as well and you will find additional screw hidden.
Once brackets and reinforcements are removed can further inspect the area.
You'll want to clean around the area with rubbing alcohol and wire brush.
Carefully hold things together and then lightly press on crack to stitch things together, so that things are held into proper placement.
Next you will want to cut some wire mesh and form it into a reinforcement to strengthen the area.
Use the iron to carefully melt the mesh into the plastic area then use provided additional plastic to add additional structure around the cracked area.
Some areas you can't follow all the way in due to space constraints I recommend coming back later with epoxy and fixing and filling in additional structure.
You will notice once the mesh is in place the structure is much more rigid. You should do this for all cracks.
Stitch with the iron. Dont' wory about cosmetics on the top where speakers go. Keep in mind that this area will be covered by the dash pad. More care should be taken in the area around the glove box, so be careful not to make things worse.
This is a tedious project and you need to be careful with the hot iron at all time so that you don't damage any thing. The Iron is so hot that it would cut through the dash like it's butter, to take great care.
The driver side speaker spot had multiple spider cracks that aren't easily visible. However, I decided to add the wire mesh on both sides and reinforce. This made the area very strong.
Slowly working in the extra reinforcement.
This is the bottom side of the speaker hole on driver side.
I plan on washing the whole dash and repainting it black. to match my original, which is still in the car. I didn't get it pulled yet.
1979 Ford Mustang Dash Restoration Begins
To start off get a bucket of water with degreaser additive added and wash the dash. Use a brush to agitate and remove dirt and grime where you see it. Clean thoroughly in preparation for painting.
Speed nut that is used here to hold the wood grain panel on front passenger side of dash did not look like they would come off with out breaking the panel stud, so I left the panel on rather than chancing to break it.
In order to carefully pull these vents you need to have them in the open position.
Here I am showing the spot to push in on the top to release the vent. You will need to push on top and pull on bottom tab with a pick.
I am hooking in with the pick here on to pull the vent safely and carefully.
I taped off the wood grain in preparation of painting.
For the metal structure that was rusty, I pulled out the sand blaster and went to town then coated them with rust reformer.
The dash hull came out beautifully.


No comments:
Post a Comment